SETUP OPENVPN ON A NAT VPS

Control Panel Setup:
Once you’ve purchased a server it takes around 3-4 minutes for an email to arrive with details to access the control panel. After logging in you’ll be greeted by this page:

If you scroll down, you’ll want to make sure TUN/TAP is turned on (It’ll most likely be off by default):

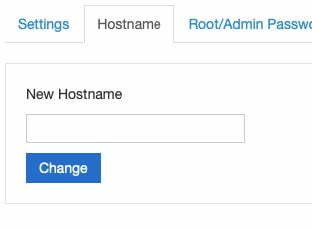
I’d also recommend adding a new hostname and a strong root password.

Now is when I reinstalled the system OS to make sure all those changes have been updated. This can be done via the reinstall button

Now I’d normally use Ubuntu cause that’s what I’m most familiar with however after trying multiple times with no success I quickly gave up on Ubuntu and tried Cent OS. The first few attempts didn’t work but now I’ve got it working with “CentOS 7 64bit Minimal”

So, pick that one then click “reinstall” at the bottom. You’ll be asked to confirm and then you’ll need to wait for around 5 minutes before doing anything. SSH into VPS
Now you should be able to SSH into your VPS. Big thing to note is the port
ssh root@???.???.???.??? -p ?????
This should now just give you an SSH window logged in as root.

Installing OpenVPN
The first thing that is recommended is a quick update (which might take a while… mine had 271 updates to run).
yum update
Then fetch the script for installing OpenVPN
curl -O https://raw.githubusercontent.com/angristan/openvpn-install/master/openvpn-install.sh
chmod +x openvpn-install.sh
and finally, run the script
./openvpn-install.sh
You should get something that looks like this:
(It’ll most likely auto-fill with the internal IP address and which point I just pressed enter)
 It’ll then ask for the Public IPv4 address (this can be found at the link provided in the initial setup email):

It’ll then check for IPv6 compatibility and whilst you could run it on IPv6, I said no because neither my fixed ISP nor mobile phone plan supports IPv6 so it’s pointless to me.

Then you need to specify the port you wish to use
The setup email will provide a link to your external IP as well as a list of the ports you have access to. This will look something like this: “Port Range: XXXXX to XXXXX”
Make sure you tell the OpenVPN server you wish to specify a port (Option 2)

and then you need to specify the exact port you want to use (pick one from your range):
![]()
Most of the other questions will be the default option where it’ll auto-fill the value for you.
Select number 1 for UDP:

Pick a DNS provider… you can use the default server 1 or use something like Google or Cloudflare. Cloudflare (number 3) is the default and uses the 1.1.1.1 server which you can read more about here https://1.1.1.1/dns/.

Select no to compression:

NO for custom encryption settings:

It will display the following message at which point you just press any key and then wait for the install

After a minute it will ask for a client’s name. You can use anything but I’ve just called mine “main”

You’ll then be asked if you want to add a password for the client. Whilst the default is a passwordless client, I’d recommend using a password that way if anyone ever gets hold of your connection file, they’ll still need a password to connect to your VPN server.

It will then ask for the password twice (2nd time to verify).

The server installation is now complete!
You can check the server status using the command
systemctl status openvpn@server
This should spit out that the server is now running:
![]()
Connecting to the server
In the process of installing the server you’ve just created a connection profile called main.opvn which is saved in the main root directory.
You should be able to see both the install script and the connection file by using the list directory command:
ls
Which should display the following:
![]()
You now need the main.ovpn file on your desktop or phone to connect. Unlike many other VPS servers, there is no pre-installed FTP server which makes it harder to get that file, and whilst you could set up an FTP server and port forward, I’m lazy and don’t want to deal with the extra install involved in that process. Instead, I’m just going to copy the text out of the install file. If you have SCP access you could use that however I’m not sure if it’ll work with the limited ports available.
Being such a light OS there isn’t a text editor installed but you can install nano
yum install nano -y
This will ask you if the download size (around 1.6MB is ok) so just enter y
It should only take a few seconds and it’ll then say “complete!”
It’s now possible to open the OVPN configuration file with nano by entering
nano main.ovpn
You’ll be greeted by the following which you can copy and paste into a text editor. I’m using sublime text and make sure you scroll down to capture it all. Make sure you don’t copy the same line twice as it needs to match exactly (scroll down will still show some of the lines that you may have previously copied). Mine has 78 lines and it should be the same assuming you’ve entered a password for the configuration file.

Once done you can exit the nano editor by pressing Control-X. Save this file from your text editor making sure to use the same name and extension .ovpn as it’s saved on the VPS.

Now you can open the file using your preferred OpenVPN client. On a Mac I use Tunnelblick, however, you can also a Mac or Windows client from the OpenVPN website or use the mobile apps for iOS or Android.
You can download the OpenVPN application from:


Connect Using your PC:
To connect from your PC you will need to download the OpenVPN app:

Tunnelblick prompts if you wish to install for all users or just yourself (your preference) and then after pressing connect you’ll be asked for the profile password you set up during install.

It should then be connected via your VPS server:

Status and Control Commands:
If you want to stop the OpenVPN server use:
systemctl stop openvpn@server
If you want to start the OpenVPN server use:
systemctl start openvpn@server
If you want to restart the OpenVPN server use:
systemctl restart openvpn@server
If you want to check the OpenVPN server is running use:
systemctl status openvpn@server
Finally, on such a small server performance is often important. In standby (sleep mode) OpenVPN uses around 4% of the memory and 0% of the CPU.
This can be viewed by using the top command:
top
This will show something like this:

To quit this screen just press q
With a single user connected this increase to around 0.3% of the CPU and still around 4% of the memory. Under a heavier load (a fast.com speed test pulling 18mbps) this increases to around 7% of the CPU.
And Have Fun 🙂